Easy 90s Inspired Nail Art Designs
This post may contains affiliate links. Read my disclaimer policy here.
There are two things that has come to light as a result of this post.
1. I saw a photograph recently of my nails, maybe taken a few years ago, and I was actually really shocked on how they looked. They were just so short and really badly maintained. I still definitely don't have the best nails in the world, but after my 17 promises, I am trying my hardest to look after them, and the results are showing.
2. This post actually got published. I was 90% sure this post wouldn't go ahead, not because I was very unorganised, but because this is my first nail art design I have ever done. I have tried to do some sort of "nail art" in the past and it just didn't happen.
If you haven't heard about why my September posts are all 90s based, where have you been?! You've already missed out on the cutest wallpapers ever, a playlist that will bring instant nostalgia, and a completely personalised fabric journal cover diy. For todays post, our nails are about to get 90s-fied. The oldest I was in the 90s was 10, and I don't think I was into painting my nails just yet, so I guess 16 years later is the perfect time to start.
I am honestly so proud of my first nail art designs. To start off, I went looking for some inspiration on the best place I know to find inspiration; Pinterest. If you follow me, you'd know that I have a 90s kids board filled with all of my favourite 90s inspired fashion. Luckily, 90s patterns were filled with geomatics shapes and very bold colours, perfect to translate into nail art. If you're looking to create your own design set, once you've found your inspirational images, pick areas or shapes of the designs that you like, and plan what design you want on which nail. I found it easier to do a quick sketch to get a rough idea.

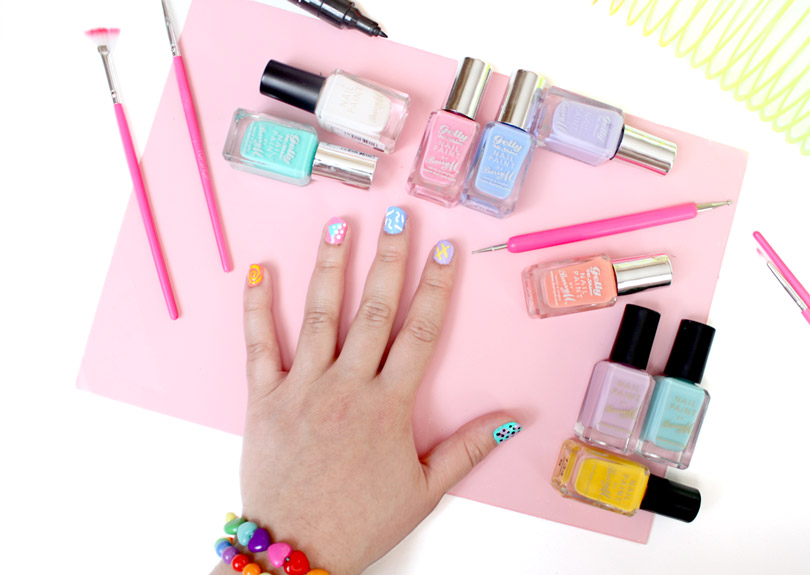
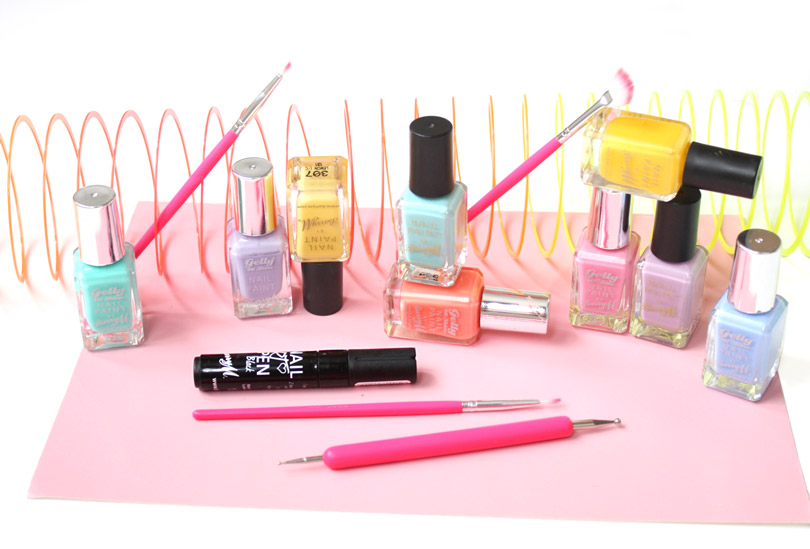
All the nail colours I used are Barry M, and you obviously don't have to use the same colours as me, but I'll include the colours in case you want to use the same, or you're lusting over some new nail paint colours. Make sure your nails are filed, moisturised, and prepped before you begin. Start off by picking your base colours, the brighter the better. From thumb to little finger I used, Greenberry, Prickly Pear, Blueberry, Dragon Fruit, and Papaya. Try not to apply too many coats, as you'll be layering other colours with your designs, and I find that anything that's too thick just peels right off, and you don't want to ruin all your hard work!
Once your nails are completely dry, (I like to leave mine for 24 hours, just to make extra sure), it's time for the fun to begin. I used nail art brushes, but you can use things you have lying around the house. For lines, you can file down the end of a matchstick, for dots use a bobby pin, and for guides, use masking, or washi tape. For my little (yellow), middle (white), and index fingers (lemon ice-cream), I stuck to very simple shapes, swirls and lines. 90s patterns has a very free-hand feel, so you don't need to concentrate on making them perfect.
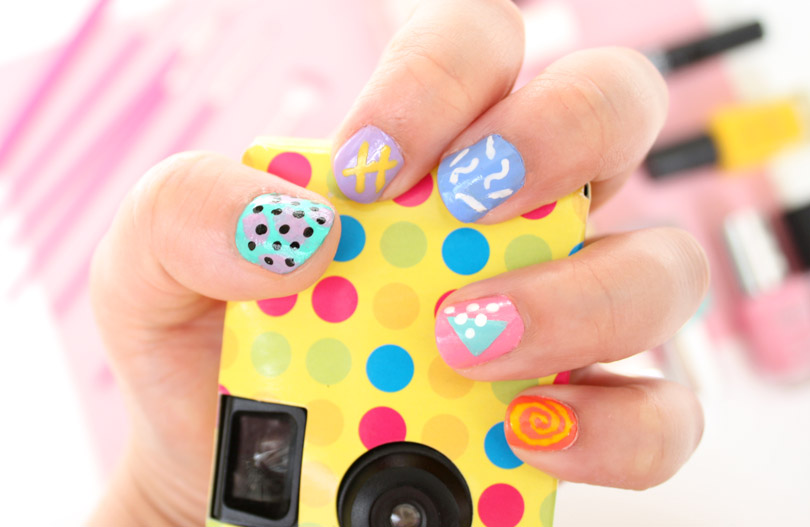
My two favourites are my thumbs, and ring fingers. I got a little experimental here and layers a few colours and shapes. For my thumb, I used a tiny brush to do little strokes (berry ice-cream), and over the top, using a nail art pen, I created dots all across my nail. I used the same concept for my ring finger, except I used tape to help me fill in the triangle (mint green), and created an overlapping triangle using white dots. To finish off, seal your nails with a clear topcoat (all in one nail paint), and you're now ready to show off your beautiful nails.
How fun are these nails? I've heard from a lot of people that it reminds them of Saved By The Bell! Let me know in the comments below any nail art tips you've got. Seeing as this post went so well, I'm encouraged to try this again... maybe around Christmas...


LEAVE A COMMENT BELOW
and let me know your thoughts on this post!