Create Your Own Bubble Art Prints
This post may contains affiliate links. Read my disclaimer policy here.
I don't remember much about my childhood, so being in primary school was definitely a blur for me, but there are a few things that will always be clear in my mind, and one of them is...
...art and design class.
This didn't happen very often, but I can always remember the excitement that filled me when I would walk into the classroom and see all the creative fun that was about to happen.
But there was one particular activity I loved doing the most... bubble art.

I was always that kid who would blow bubbles into their drinks and got it everywhere, so being allowed to do it, while making art was just a dream for me. So, when better than during 90s month to recreate it. This was honestly the simplest diy I have ever done on my blog, but it has given some of the best results. When it comes to bubble art, it doesn't matter your artistic level, it's so abstract, you will always create a masterpiece.
You can really create a lot in a short amount of time, so experiment on different types of weights, textures and colours of papers; cards, tracing paper, graph paper. I know that this always seems wrong, but if you have a very old book, pull out the pages and throw some bubbles on there; perfect for a bookmark. You can use your prints for absolutely anything such as gift-tags, framed art, postcards, business cards... if it's made from paper, you can bubble art it. You can use it as the background to artwork and draw over the top, or scan it to your computer and use it as wallpaper. My favourite design I created is the writing set with envelope and letter sheet. This was an accidental love, and I didn't realise how much I loved it until I saw them together. I printed over the top with guidelines and added a 'Dear' to start off this lovely note. Imagine receiving this through the mail.


Not only was this an accidentally love, but it also sparked something in me. In a recent post where I mentioned 6 goals I want to achieve by the end of the year, I talked about how I wanted to start brainstorming ideas about a little business I was planning on starting next year. I'm not saying bubble art letter sets are going to be it, but I like the idea of sending mail. As much as we rely on sending a text or email as it is convenient, there is nothing better than opening a handwritten note, and holding onto it as a keepsake. I'm definitely going to keep this idea in mind, so let me know what you think. This might seem like a childish activity, but sometimes we need to go back to things we loved as kids to really spark that creativity we had forgotten, or never even knew we had.
There are two ways you can create art with bubbles, the way I've always know is by blowing bubbles into a container and placing your paper over the top. Another way is to dip a bubble wand into your solution and blowing straight onto your paper. Once they pop, you get a perfect circle with a bold outline. They don't always go to plan, so you may get some drips, but that just adds another layer of texture. You can combine both techniques, or stick to one. The shape of your cluster bubbles will change depending on the size of your container, so experiment with that too. It's time to get all our materials together and start making.
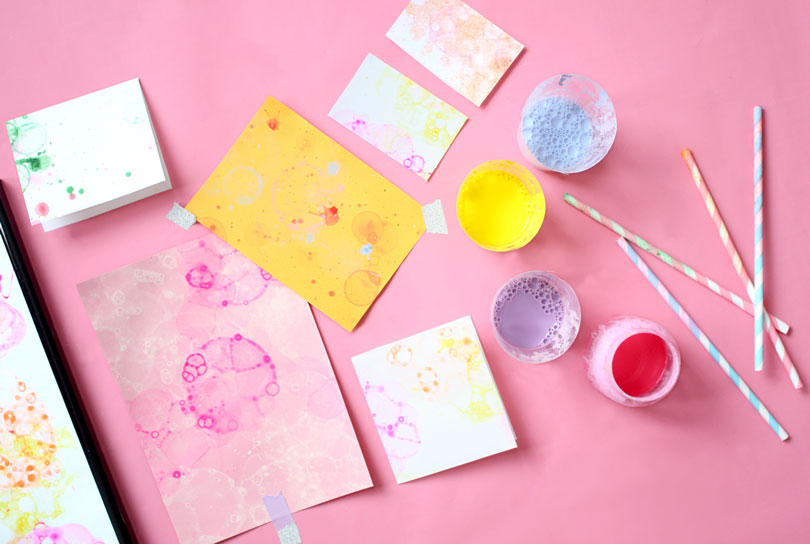
YOU WILL NEED:
- A range of paper in different textures, colours and weights
- Washing-up liquid
- Paint
- Water
- Different sizes of containers
- Straws
- Bubble wands
INSTRUCTIONS
-
To prepare the solution, mix together your washing-up liquid and your choice of colour. Gradually add water. It's easier to add water than take away, so test the bubbles before adding more water. Repeat this with all the colours you want to use.
-
Blow into your solution until the bubbles rise above the container, and carefully place your paper on top. Use a bubble wand to blow bubbles directly onto your paper.
-
Continue until you're happy with your print. Once dried, cut up your paper into your chosen design.

If you try creating bubble art, I'd love to know what you turned your prints in to. Let me know in the comments below if you remember doing these in school. I have one more post left in this 90s series coming at the end of the week. It's one of my favourites so you really don't want to miss that.


LEAVE A COMMENT BELOW
and let me know your thoughts on this post!