
Create Your Own Pom Pom Cushion Cover With Zipper
This post may contains affiliate links. Read my disclaimer policy here.
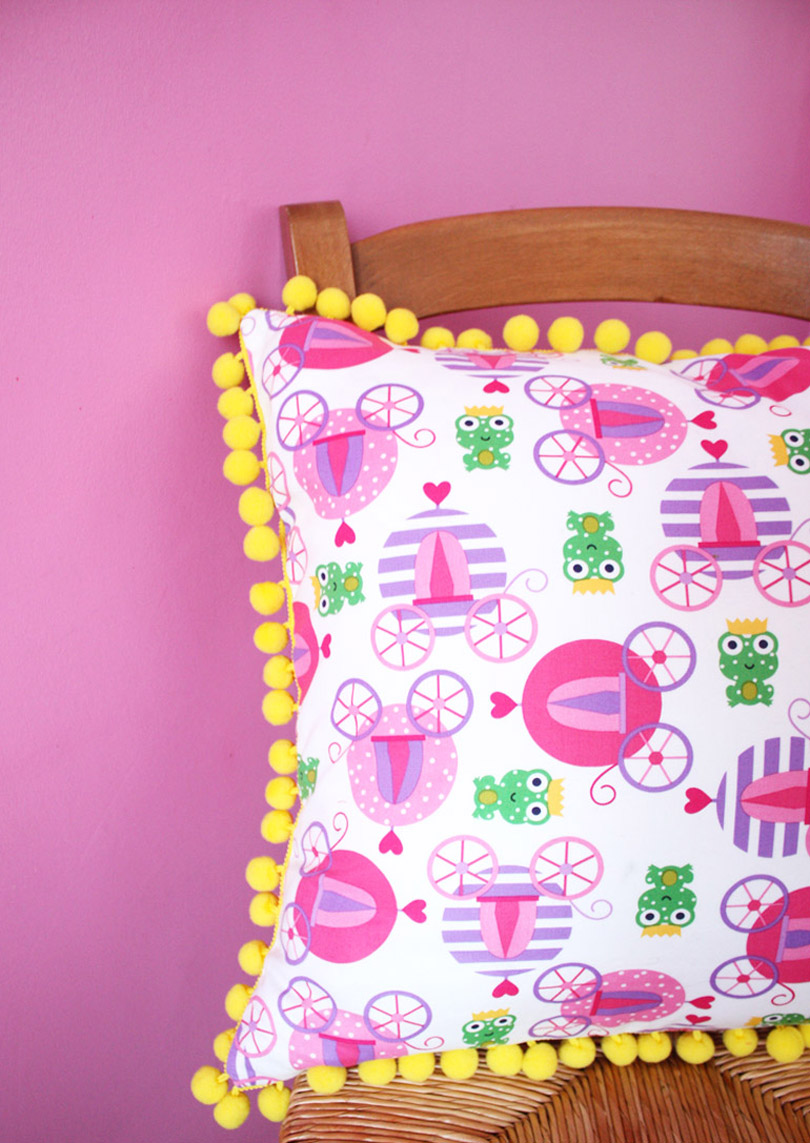
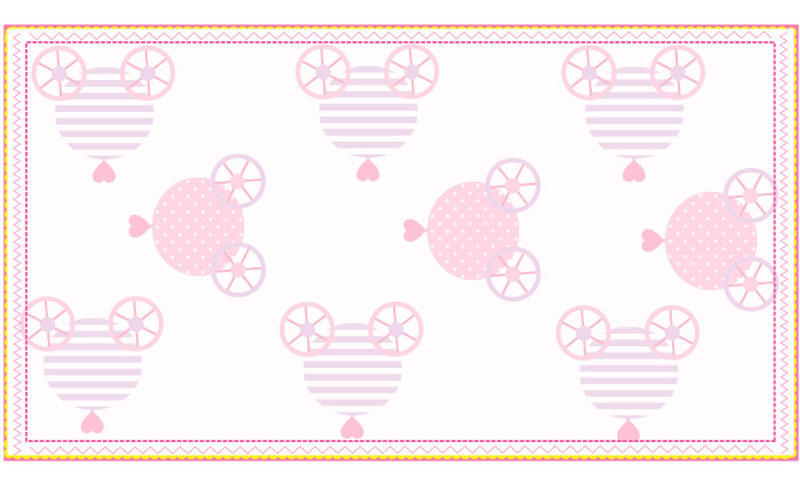
I was thinking about what diy project I should do first. I was looking online for some inspiration, and I came across this beautiful fabric by Ann Kelle and Robert Kaufman and I knew instantly this needs to be a cushion cover. I'm not one to keep things plain, so I had to add in the pom poms too! They are of course optional in this tutorial, but doesn't it just look so cute with them. You can really customise your cushion cover however you like; you can create your own fabrication, patchwork, or with embroidery. It is all up to you. If you have an old cushion you don't like anymore, you can even use that instead of a cushion pad.
It may seem like a lot of the instructions but I've broken it down to its simplest form. If you haven't sewn before, that's completely cool. It doesn't matter if you aren't confident with the sewing machine, most of the stitching is on the inside so it doesn't matter if it's a little wonky. I guess that makes it more personal and homemade. My diy projects are here to inspire and motivate you to try something new. Take your time with it, and most of all have fun. Now let's get started!
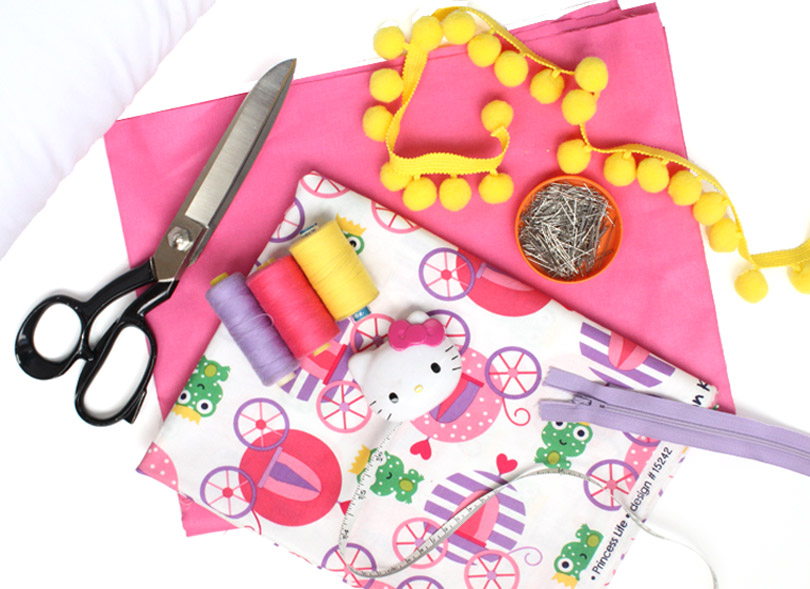
YOU WILL NEED:
- a sewing machine with zipper foot
- medium-weight fabric/contrasting fabric for back
- pom pom trim
- zipper
- thread
- measuring tape
- hand needle
- pins
- fabric scissors
- thread unpicker or small scissors
- fabric chalk
- cushion pad
INSTRUCTIONS
Using a measuring tape, measure the height and width of your cushion pad and note the measurements down. This will help determine the width and height of your fabric.
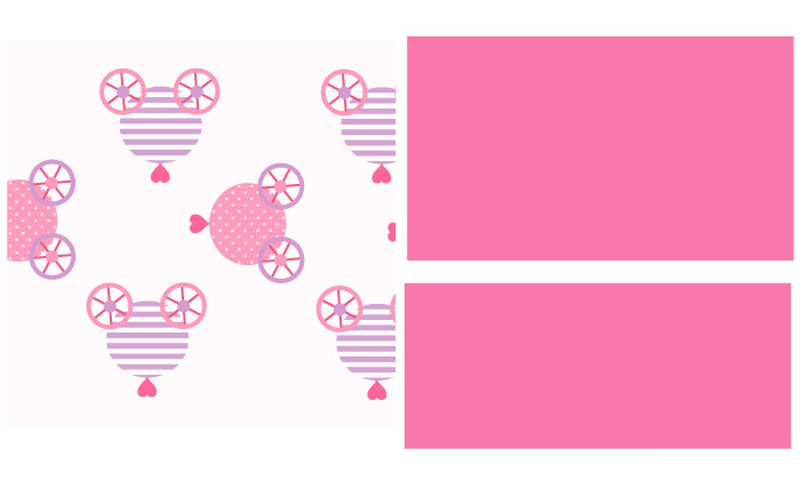
For the front of your cover, add 2" to the height and width (18" x 17" would become 20" x 19"). The extra inches will allow a 1" seam allowance when you're sewing. For the back of your cover, you will need two pieces as a zipper will join the two together. One piece will need to be longer than the other, but both pieces together will need to equal the height of your cover. For example, my larger piece is 11" and smaller is 7" and both equal to 18", which is the height of my cushion. It doesn't matter how you decide to spilt the pieces up, as long as they're equal to the height of your cushion. Once you've decided on your measurements, again add 2" to both the height and width of each piece. Make sure your fabric is ironed before cutting. Using your fabric chalk and ruler, mark out your pieces and cut.

For this step, you will only need your front piece. Working on the right side of the fabric (where your print/design is), pin the pom pom trim around the edge of the entire fabric. My trim was exactly an inch wide, so I just lined it up on the edge. Depending on the width of your trim, make sure it sits at your 1" seam allowance, and not over this line. With a large zig-zag stitch, sew the pom pom trim to your fabric. This step is optional but definitely recommended. You can be creative with the placement of pom poms, for example, only having it on two sides, just around the corners, or around your entire cushion cover like mine.

Take one of your back pieces and on the wrong side of your fabric, find the centre across the width. Line the centre of your zipper to the centre of your fabric and pin once to secure. With your fabric chalk, mark down a notch between the zipper teeth. This will be your guide to position your zipper when you're sewing your pieces together. Don't worry, it will all make sense later on. Remove the zipper.

Working with both your back pieces, place them on top of each other with the two right sides facing each other. Line up the bottom edge (make sure you can see your chalk notches), and pin the two pieces in place. Set your machine up with a straight stitch, and sew until you reach your notch. Don't forget your 1" seam allowance! Once you've reach your notch, backtack and change the stitch length to the widest. Continue sewing until you reach the 2nd notch, backtack and then return to the original stitch length.
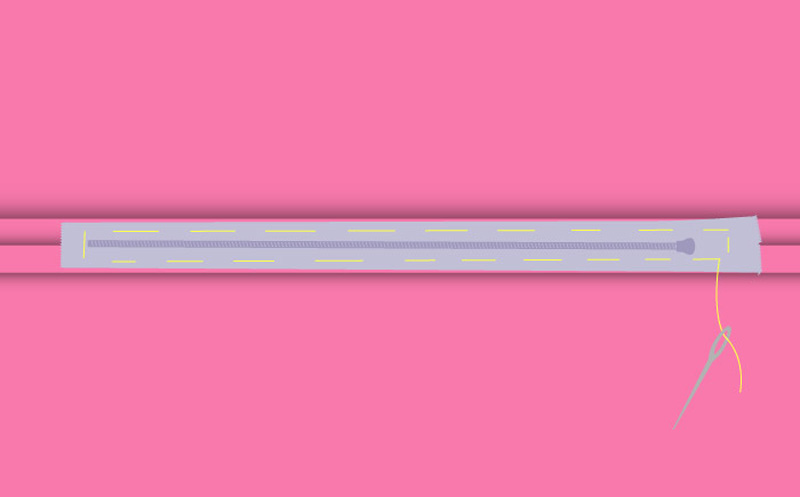
Turn your fabric to the wrong side and open it up, pressing down on your seam. Line up the back of your zipper between the two notches you made. Make sure the zipper teeth are lined up to the seam and hand tack your zipper in place. Keep checking that the zipper teeth are in line while you're sewing. It doesn't matter if your hand tack this isn't perfect as you'll be removing it later on, it's there to help with the next step.

Now working on the right side of the fabric, with the zipper foot, sew around the zipper. Make sure you keep the edge of the foot close to the teeth as a guide. Take your time with this step as you don't want to accidentally sew over your zipper or you won't be able to open it. If you're not feeling confident, feel free to do this by hand.

This is always my favourite part...unpicking! With an unpicker or small scissors, remove your hand tacked thread, then carefully unpick the stitching from inside your zipper seam. This is why we needed a larger stitch when we were sewing the two back pieces together. The larger stitch makes it a lot easier to remove the stitching. Remove any loose threads from both sides of the fabric. If you have any tweezers it might make it easier to get hold of those smaller threads. You now have a fully working zipper!

Now we can start assembling our cover! If your fabric is a little creased, it's a good time to iron. Place your two pieces, (with the zipper open) right sides facing, and pin to secure. If the front of your fabric has a design that needs to face a certain way, make sure it lines up with the zipper on the back piece. Sew around your cover, not forgetting that 1" seam allowance we added on at the start. My trim has scalloped edges which I wanted to incorporate in my design, so I sewed a little off an inch. While you're sewing, feel through the fabric to make sure those pom poms don't get under your needle. Mine are very large and had a mind of its own!
Cut away any loose threads, and trim any excess fabric you may have. Using an overlocking machine, secure your fabric edge. This is optional, it depends on how loose your fabric is or what equipment you have available. Feed the cushion cover through the open zipper and using your scissors closed, carefully poke into the corners to give it its full shape. Put your cushion pad inside your cover and zip it closed. I had a single pom pm left over so I attached it to the zipper pull as a little extra detail.
Congratulations! You're now the proud owner and maker of this super cool pom pom cushion cover!


This has been such a fun post to make and you should give it a go too. Remember, it doesn't matter if you haven't sewn before, just go for it. If you have any questions about how to make the cushion cover, or need a little more explaining, just let me know. There will definitely be more creative posts in the future, so if there is anything you're dying to make, let me know.


LEAVE A COMMENT BELOW
and let me know your thoughts on this post!